One day, our manager Ravjiv walked in like Santa Clause with a couple full body transparent touch monitors. We never got a project to do anything with them, so with some downtime I decided to make an interactive stained glass window, which a depth enabled interface.
Sadly I never completed this project and don’t have a video of it playing on the monitor, the background was just an Unreal ocean - in the intended final product you would just see through it to the world.
<iframe width="560" height="315" src="
title="YouTube video player" frameborder="0" allow="accelerometer; autoplay; clipboard-write; encrypted-media; gyroscope; picture-in-picture; web-share" allowfullscreen></iframe>
Rachel designed a variety of beautiful window patterns, cut them all apart in 3d Max, and did the fine detail sculpting on the foam. Seth integrated the Perceptual SDK’s finger tracking into Unreal, and connected it to a fadecandy to drive the lights.
I built the physical skeleton, and the Unreal Components. Here’s a breakdown:
Skeleton
The first thing I did was weld a stand, which could hold the television. I did it with a MIG welder, and steel.
I got eyeballed it (like making a sewing pattern) and it came off slightly angled, though the TV fit in snugly when I took some of its frame off.
My plan was to build a polystyrene frame (a sculpt-able foam insulation you can get at Home Depot, Home Depot Pro if you want it in 2″ x 4′ x 8′ sheets like I did). But in order for it to fit, it had to compensate for that strange angle my weld made. In the future when welding strait angles, I plan on making a frame to hold my metal in at the correct angle!!!
To get it right, I ended up hanging a needle off thread from different points, and then measuring their XY distance from center bottom. The rest of the measurements (length and width of metal cuts) were really straightforward. I was worried it won’t work, but to my surprise, my foam mold came out really accurately.
With that, I made a 3d file for what I wanted my exterior wall to look like, and made it hollow around where I thought the internal skeleton would be.
I broke it into 2″ thick 3d files and then fed that into the ShopBot Alpha at TechShop. I exported my slices to .STL, and then fed them into Cut3d, which was a strange program to get used to, but worked fine once I figured it out.
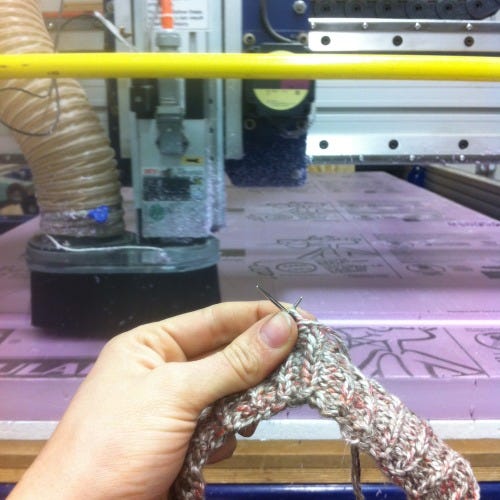
Then it was just a waiting game, which I used to knit. It took about 2 hours per print, of which I had 7. Slice 6 had to be cut on both the front and back which made it 16 hours. I knocked it all out in one night, because I only had one shot at borrowing a truck.
I realized last minute that I needed arrows to move from one scene to the other, so I just cut them out by hand with an exacto blade. You can get nice sculpting results with a Stanley Surfoam Shaver and sandpaper.
lights
Unreal
I downloaded this beautiful ocean scene and used that as my background, deleting all the extras.
I won’t go over all the details of putting it together, you can download it and look it over in Github. Note- its big and unedited for human consumption!
Here are some interesting things I discovered along the way:
You can’t make a public array of mesh components. You can add them into the array at the construction script using “make array”, and then promote that to a variable. I used that to create a changeable script on the buttons.
You can promote a series of calls to a function, when things are starting to repeat for cleaner “code”
If you need to fake a mouseover without using the actual mouse (in my case I was planning on replacing mouseover with an event generated by the depth camera) you can use “line trace component”. It acts like a raytrace. Give it the starting point of “World Location”. For “Trace End”, multiply “World Direction” with some large number (I used 10,000), and add it’s output to World Location, and feed that into “Trace End”
Creating a state machine to handle individual mesh components using “Add Timeline”, even when using unique Timelines, gets REALLY difficult. I gave up and just made each of the GUI items their own separate object. (Though Switch on Int was really helpful, if you have an active index)
It seems better to Create Dynamic Material Instances in Blueprint, rather than actually making them as part of your local assets. That way unreal gets rid of them when you’re done- and takes care of the memory management for you.


